
Makeup
How to Lift Subjects Out of Photos in iOS 16
Jun
There are iPhone features that arrive quietly, sit in a corner, and wait for you to notice them. Then there is iOS 16’s subject-lifting trick, which basically jumps out of the Photos app wearing jazz hands. With one long press, you can lift a person, pet, building, plant, bowl of noodles, suspiciously photogenic latte, or other clear subject out of a photo and paste it somewhere else. No Photoshop. No green screen. No “I watched three editing tutorials and now I need a nap.”
This feature is often called Photo Cutout, Lift Subject from Background, or simply the iOS 16 photo cutout feature. Apple built it into Visual Look Up, the same general intelligence system that helps your iPhone recognize objects in images. In iOS 16, that intelligence became much more useful: instead of just identifying things, your iPhone can isolate the main subject and let you copy, share, drag, or paste it into other apps.
Whether you want to make a quick sticker-style image for Messages, remove a background from a product photo, create a funny reaction image, or drop your dog’s majestic face into a Notes document because productivity deserves joy, this guide explains exactly how to lift subjects out of photos in iOS 16.
What Does “Lift Subject from Background” Mean in iOS 16?
In plain English, lifting a subject means your iPhone automatically detects the main object in a photo, separates it from the background, and turns it into a cutout image. You do not manually trace around the edges. You do not erase the background with your finger like a tiny digital archaeologist. You just tap, hold, and let iOS do the heavy lifting.
The lifted subject usually appears with a transparent background when pasted into apps that support image transparency. That makes it perfect for messages, presentations, social posts, memes, notes, emails, digital scrapbooks, and quick design mockups. It is not a full professional editing suite, but for a built-in iPhone tool, it is impressively clever.
iPhone Models That Support Photo Cutout in iOS 16
Here is the tiny catch hiding behind the confetti: not every iPhone that can install iOS 16 can use this feature. The subject-lifting tool requires an iPhone with the A12 Bionic chip or later. That means it works on iPhone XR, iPhone XS, iPhone XS Max, and newer models.
If you have an iPhone 8, iPhone 8 Plus, or iPhone X running iOS 16, you may still have many iOS 16 features, but the photo subject cutout option may not appear. This is not because your phone is being dramatic. It is because the feature relies on on-device image processing, and Apple limits it to newer hardware.
Where You Can Lift Subjects from Photos
The most common place to use the feature is the Photos app, but it is not limited to your camera roll. In iOS 16, you can lift subjects from images in several places, including:
- Photos: Great for pictures you have taken or saved.
- Safari: Useful for images on web pages.
- Quick Look: Handy when previewing images in Files or other apps.
- Screenshots: Helpful when you want to isolate something from a captured screen image.
- Messages and Mail: In many cases, images opened from conversations or emails can also work.
The exact options may vary depending on the app, the image, and the iOS version installed, but the basic idea is the same: open an image, press and hold the subject, then copy or share the cutout.
How to Lift Subjects Out of Photos in iOS 16
Ready to make your iPhone act like a tiny background-removal wizard? Here is the standard method using the Photos app.
Step 1: Open the Photos App
Start by opening the Photos app on your iPhone. Choose a photo with a clear subject. People, pets, flowers, buildings, food, cars, and objects with defined edges usually work best. If the subject blends into the background like a beige cat on a beige couch, your iPhone may politely give up.
Step 2: Open the Photo Full Screen
Tap the photo so it fills the screen. This makes it easier for iOS to detect the subject and gives your finger a fighting chance of pressing the right thing. If you are viewing the photo in a grid, open it first. The feature works when the image is displayed clearly, not while it is hiding among 47 nearly identical vacation photos.
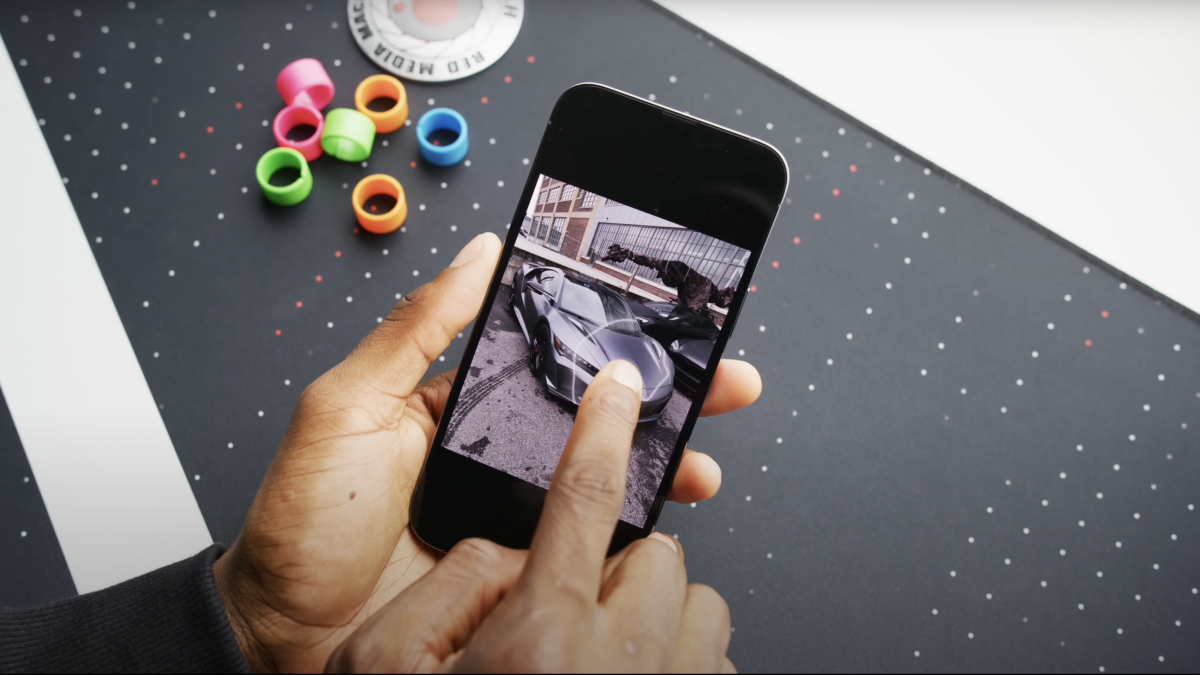
Step 3: Touch and Hold the Subject
Press and hold directly on the subject you want to lift. After a moment, you should see a glowing outline or subtle animation around the subject. This is your iPhone saying, “Aha, I found the thing.” You may also feel a small haptic vibration.
If nothing happens, lift your finger and try again. Sometimes the first press wakes the feature up, and the second press gets the job done. Technology, like humans before coffee, occasionally needs a second attempt.
Step 4: Choose Copy or Share
Once the subject is highlighted, a small menu should appear with options such as Copy and Share. Tap Copy if you want to paste the cutout into another app. Tap Share if you want to send it directly through Messages, Mail, AirDrop, Notes, social apps, or another available destination.
Step 5: Paste the Cutout Somewhere Useful
After tapping Copy, open another app and paste the subject just as you would paste text. For example, you can paste it into a Messages conversation, a Notes page, an email draft, a Pages document, or a compatible image-editing app.
The result is usually a subject cutout without the original background. Congratulations: you have just performed a tiny act of digital magic, and you did not even need to download an app named something like “Background Remover Pro Ultra Magic AI Plus.”
How to Drag and Drop a Lifted Subject
If you enjoy feeling like an iPhone power user, you can also drag the subject into another app. This works especially well if you are comfortable using two fingers at once.
- Open the image in Photos.
- Press and hold the subject until it lifts from the background.
- Keep holding the subject with one finger.
- Use another finger to swipe up and open another app.
- Drop the subject into a text field, document, note, or conversation.
This method is a little more advanced, and yes, it can make your hands feel like they are auditioning for a piano competition. But once you get used to it, dragging cutouts directly into Messages, Notes, or creative apps feels fast and natural.
How to Lift Subjects from Images in Safari
You can also lift subjects from web images in Safari. This is useful when you find an image online and want to isolate the main object. Here is how:
- Open Safari and find an image with a clear subject.
- Press and hold the image.
- If iOS detects a subject, you may see an option such as Copy Subject.
- Tap the option, then paste the cutout into another app.
Keep copyright and usage rights in mind. Just because your iPhone can lift an image from the web does not mean you automatically have permission to use that image commercially. Your iPhone is powerful, but it is not a lawyer in a tiny aluminum suit.
Best Types of Photos for iOS 16 Subject Lifting
The feature works best when the subject is visually distinct from the background. For example, a person standing in front of a plain wall will usually cut out beautifully. A golden retriever sitting in yellow leaves may confuse the system because the dog and background are basically wearing matching outfits.
Photos That Usually Work Well
- Portraits with clear separation between person and background
- Pets against simple backgrounds
- Food photos with strong contrast
- Products photographed on a table or plain surface
- Flowers, plants, cars, and buildings with defined edges
Photos That May Not Work Well
- Blurry or low-light images
- Subjects with messy hair, fur, smoke, glass, or transparent edges
- Photos where the subject and background are similar in color
- Crowded scenes with multiple overlapping objects
- Images where the subject is too small or partly hidden
For the best result, choose a sharp image with good lighting and contrast. If you are taking a photo specifically to use as a cutout, place the subject in front of a simple background. Your future self will thank you, probably while making a meme.
Creative Ways to Use Lifted Photo Subjects
Once you know how to lift subjects out of photos in iOS 16, the real fun begins. The feature is not just a party trick; it can be genuinely useful for communication, content creation, and quick design work.
1. Make Funny Message Reactions
Lift your friend’s shocked face from a group photo and paste it into a Messages conversation. Use responsibly. Or irresponsibly, but lovingly. This is one of the fastest ways to turn ordinary photos into custom reactions.
2. Create Simple Product Images
If you sell items online, you can lift a product from a photo and place it into a cleaner layout. It will not replace professional product photography, but it is useful for quick previews, social posts, or informal listings.
3. Build Social Media Graphics
Paste a cutout into Canva, Pages, Keynote, Notes, or another creative app. Add text, shapes, and backgrounds to make simple posts, announcements, thumbnails, or story graphics. The cutout gives you that layered design look without requiring advanced editing skills.
4. Make Digital Scrapbooks
Lift people, pets, travel landmarks, food, and objects from photos and arrange them into a scrapbook-style page. It is a fun way to summarize a trip, birthday, wedding, school project, or family event.
5. Improve Notes and Presentations
Photo cutouts can make Notes, Pages documents, and Keynote slides more visual. Instead of dropping in a full rectangular photo, you can paste only the subject. The result often looks cleaner and more intentional.
Common Problems and How to Fix Them
The iOS 16 photo cutout feature is smart, but it is not psychic. Sometimes it refuses to appear, selects the wrong area, or produces a rough edge. Here is what to do when the magic wand gets a little wobbly.
The Copy or Share Menu Does Not Appear
First, check your iPhone model. If you are using an iPhone older than iPhone XR or iPhone XS, the feature may not be supported even if iOS 16 is installed. Next, make sure the image has a clear subject. Try another photo with better contrast. You can also restart the Photos app or update to the latest available iOS version for your device.
The Wrong Subject Is Selected
When a photo contains multiple people or objects, iOS may select the main subject instead of the one you wanted. Try pressing more directly on the desired subject. If that does not work, crop the image first so the target subject is more prominent, then try lifting it again.
The Edges Look Messy
Fine details like hair, fur, lace, leaves, and transparent objects are difficult for automatic cutout tools. Choose a sharper photo, use better lighting, or place the subject against a simpler background. For professional results, you may still need a dedicated editing app, but for casual use, iOS 16 often does surprisingly well.
The Cutout Will Not Paste Correctly
Some apps handle transparent images better than others. If the cutout does not appear as expected, try pasting it into Notes, Messages, Mail, Pages, or a graphics app. You can also use the Share option instead of Copy to send it directly.
Photo Cutout vs. Background Removal Apps
So, does iOS 16 replace background removal apps? For many casual users, yes. If your goal is to grab a dog, person, sneaker, cake, or houseplant from a photo and paste it somewhere else, the built-in feature is fast, free, and convenient.
However, dedicated editing apps still have advantages. They may let you refine edges, manually erase areas, add shadows, change backgrounds, export in different file formats, or work with complex images more precisely. Think of iOS 16 Photo Cutout as the pocketknife version: quick, clever, and surprisingly capable, but not always the right tool for surgery.
Privacy and On-Device Intelligence
One reason this feature feels so smooth is that Apple designed many Visual Look Up and photo intelligence features to use on-device processing when possible. Your iPhone analyzes the image and identifies the subject without requiring you to upload it to a random third-party background remover. That is especially helpful if you are working with personal photos, family pictures, documents, or business-related images.
Still, be careful when sharing cutouts. A lifted subject may remove the background, but it does not remove context from the internet. Avoid sharing images of private documents, children, addresses, license plates, or anything sensitive unless you are sure it is appropriate.
Practical Example: Turning a Pet Photo into a Message Sticker
Imagine you have a photo of your cat sitting on the couch, judging your life choices with the confidence of a tiny landlord. You want to send just the cat, not the couch, laundry pile, and mysterious sock in the corner.
- Open the cat photo in Photos.
- Press and hold the cat until the glowing outline appears.
- Tap Copy.
- Open Messages.
- Paste the cutout into the conversation.
- Send it with a caption like, “The committee has reviewed your proposal.”
That is the beauty of the feature. It takes something that used to require editing software and turns it into a five-second action. Your cat remains judgmental, but now more portable.
Tips for Better Subject Cutouts
To get cleaner results when lifting subjects out of photos in iOS 16, keep these tips in mind:
- Use bright, sharp photos: Good lighting helps iOS detect edges.
- Choose contrast: A dark subject on a light background, or the reverse, usually works well.
- Avoid clutter: Busy backgrounds can confuse the selection.
- Try Portrait mode: Photos with natural subject-background separation often perform better.
- Crop first: If iOS selects the wrong object, cropping can make the intended subject clearer.
- Try again: A second press sometimes works when the first one does not.
Extra Experience: What It Feels Like to Use Photo Cutout in Real Life
The first time you use the iOS 16 subject-lifting feature, it feels almost too simple. You press a person in a photo, the edges shimmer, and suddenly the subject pops forward like it has been waiting years to escape the background. There is a tiny “wait, that actually worked?” moment. It is the same kind of surprise people had when copy and paste first became normal on smartphones. You quickly realize this is not just a gimmick; it changes how you handle images in everyday conversations.
For casual users, the best part is speed. Before iOS 16, removing a photo background usually meant opening a separate app, uploading the image, waiting for processing, closing an ad, declining a subscription, and wondering why your phone now contains three watermarked versions of the same picture. With Photo Cutout, the action happens where your photo already lives. You open, press, copy, paste, and move on with your life. It is small, but it removes friction.
In real use, pets are some of the most satisfying subjects to lift. Dogs, cats, rabbits, and birds often create funny, expressive cutouts that work perfectly in Messages. A lifted photo of a dog with one ear flipped inside out can become the family’s unofficial reaction image for months. People also work well, especially when the photo has a clean background. A friend jumping at the beach, a child holding a balloon, or a parent making a dramatic face at dinner can be turned into a shareable cutout in seconds.
There are also surprisingly practical uses. If you are planning a room layout, you can lift a chair, lamp, plant, or decorative item from a photo and paste it into a note or mood board. If you run a small online shop, you can quickly isolate a product to test how it looks on a cleaner background. If you create social content, you can lift yourself from a photo and place the cutout over a colored background with text. It will not replace a designer, but it can help you make something polished enough for a quick post.
The feature does have personality quirks. Hair can look slightly choppy. Transparent glass may confuse it. A white mug on a white table may produce a cutout that looks like it lost an argument with reality. And when a photo has multiple subjects, iOS sometimes chooses the one it thinks matters most, not the one you actually wanted. The trick is to treat Photo Cutout as a fast helper, not a flawless editor. When it works, it feels brilliant. When it misses, you simply try another image or crop the photo first.
After using it for a while, you may start taking photos differently. You begin noticing clean backgrounds, strong contrast, and simple compositions. You might move a product closer to a plain wall or take a pet photo in better light because you know it will make a cleaner cutout later. In that way, iOS 16’s lift subject feature quietly teaches better photo habits. Not in a boring classroom way, but in a “this meme will look better if the background is not a laundry basket” way.
The most important experience is that it makes creativity feel immediate. You do not have to plan an editing session. You do not have to be a Photoshop expert. You can react, joke, design, explain, sell, teach, or decorate in the moment. That is why this feature became one of the most beloved hidden gems of iOS 16. It turns ordinary photos into reusable pieces of visual communication, and it does so with one finger and almost no patience required.
Conclusion
Learning how to lift subjects out of photos in iOS 16 is easy, but the feature can become surprisingly powerful once you start using it. Open a photo, press and hold the subject, wait for the outline, then copy, share, or drag the cutout into another app. That is the whole magic trick.
For quick messages, memes, social graphics, notes, product previews, and creative projects, the iOS 16 photo cutout tool saves time and removes the need for extra background-removal apps. It works best with clear subjects, sharp images, and simple backgrounds, but even when it is not perfect, it is fast enough to try again. In a world where every app wants a login, a subscription, and possibly your firstborn houseplant, a built-in iPhone feature that simply works feels refreshingly delightful.
Note: This article was written based on real iOS 16 feature behavior and information synthesized from Apple support materials, Apple’s iOS 16 announcements, and reputable U.S. technology publications. Source links are intentionally not included in the body to keep the article clean for web publishing.
